Last updated on July 31st, 2022 at 11:16 am
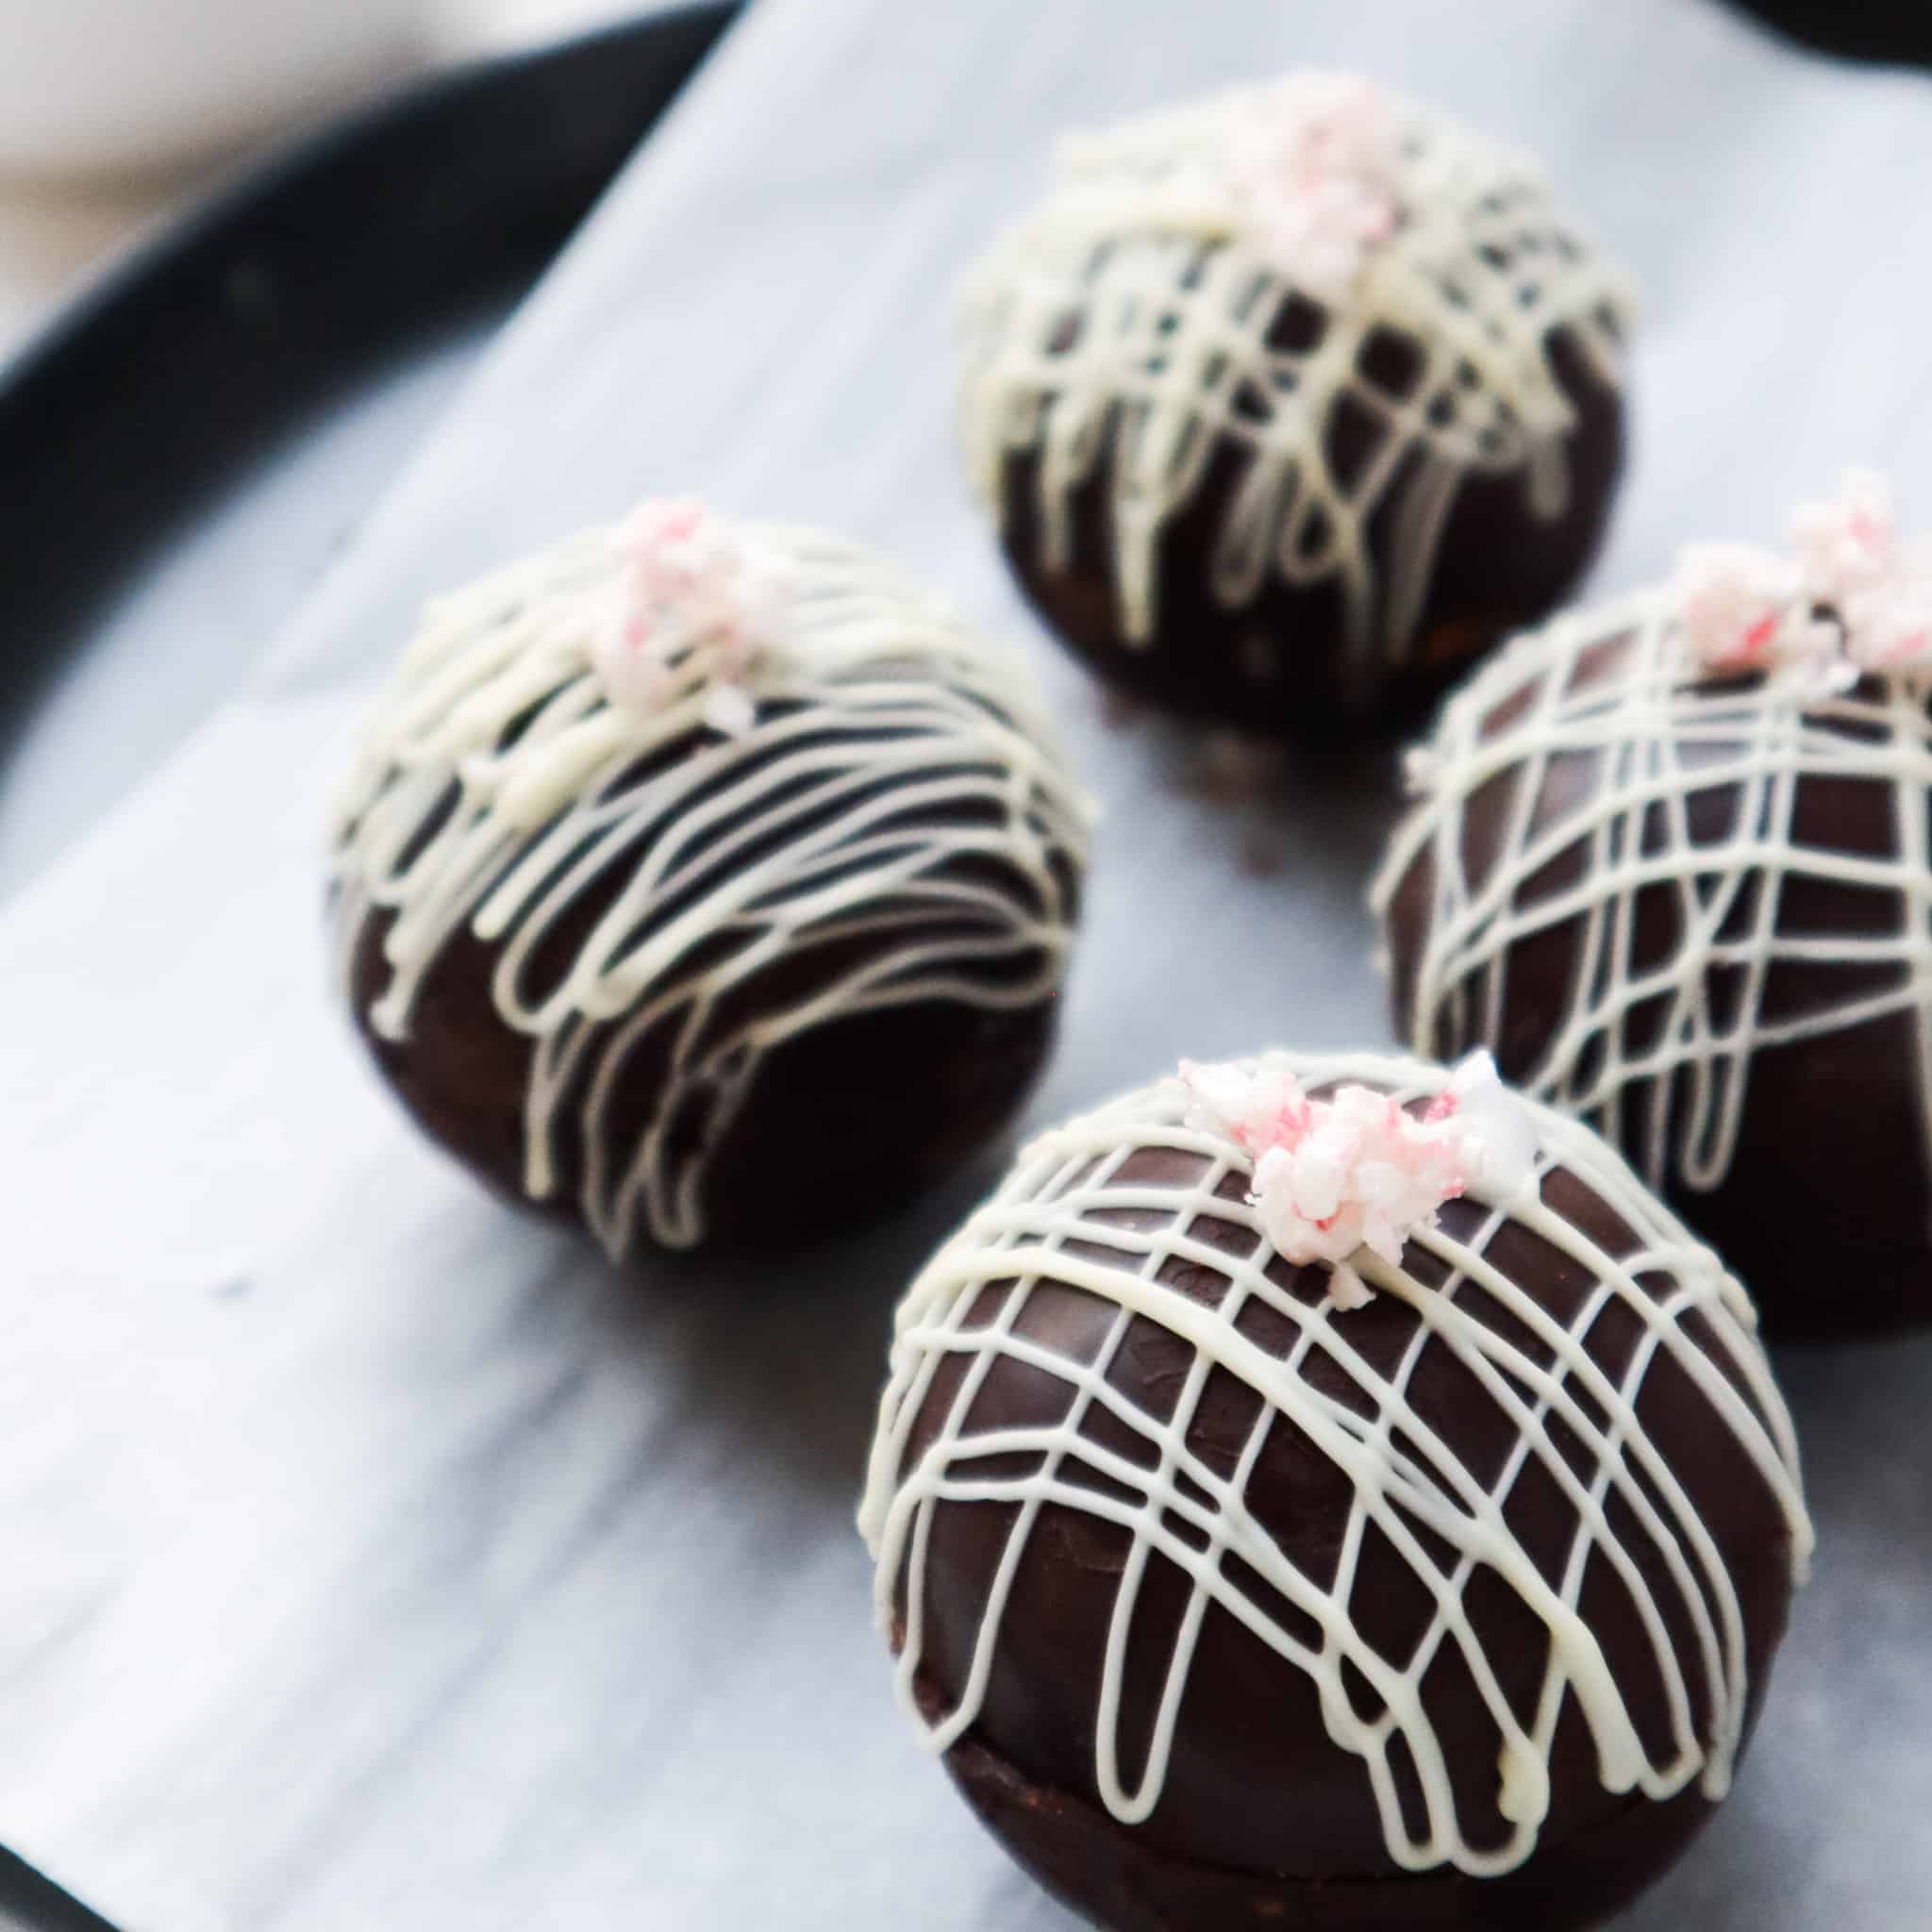
Hot Chocolate Bombs are a chocolate lover’s dream! It’s a circular mold of chocolate filled with hot cocoa mix and marshmallows. Place it in your favorite mug and pour on hot milk to make the most delicious, decadent hot chocolate! They are also the perfect gift to give to loved ones! (This recipe is vegan and gluten-free!)
This content contains affiliate links, which help goodfoodbaddie.com to provide free recipes and resources. As an Amazon Associate, I earn from qualifying purchases. Thank you for your support of the blog!
Hot Chocolate Bombs are so much fun to make! They are perfect to enjoy or great to give as a gift! If you want to skip the chocolate bomb and just make the best hot chocolate ever, try my Dairy-Free Hot Chocolate Recipe! If you want super healthy, nutrient-dense hot chocolate, try my Maca Hot Chocolate Recipe!
What You Need to Make Hot Chocolate Bombs
- Quality Chocolate is Key: Use high quality chocolate that is at least 65% cocoa. Lindt Excellence Bar or Hu Organic Dark Chocolate Bar. To keep these hot chocolate bombs vegan make sure to use vegan chocolate.
- Silicone Baking Mat: The silicone mat helps to form the chocolate balls. It is super easy to use and once the chocolate sets, you can easy push the chocolate halves out of the mold. Here’s is the Silicone Chocolate Bomb Mold I used: Medium Semi Sphere Silicone Mold. Here’s a larger size if you’d like bigger hot chocolate bombs: Large Semi Sphere Silicone Mold
- Brush or Spoon: If you have a small paintbrush (¼” to ½” in size), you can use it to brush the chocolate into the mold. If not, no worries, you can use a small spoon. I used a spoon and it worked just fine!
- Hot Chocolate Mix: Use your favorite hot chocolate mix. I used organic cacao powder.
- Mini Marshmallows: Use your favorite marshmallows. I used these Vegan and Gluten-Free Marshmallows from Trader Joe’s.
- Decorations: You can decorate the outside of your hot chocolate bombs with sprinkles, crushed candy cane, melted white chocolate crushed Oreos, whatever you like!
How to Make Hot Chocolate Bombs
STEP ONE: Temper The Chocolate
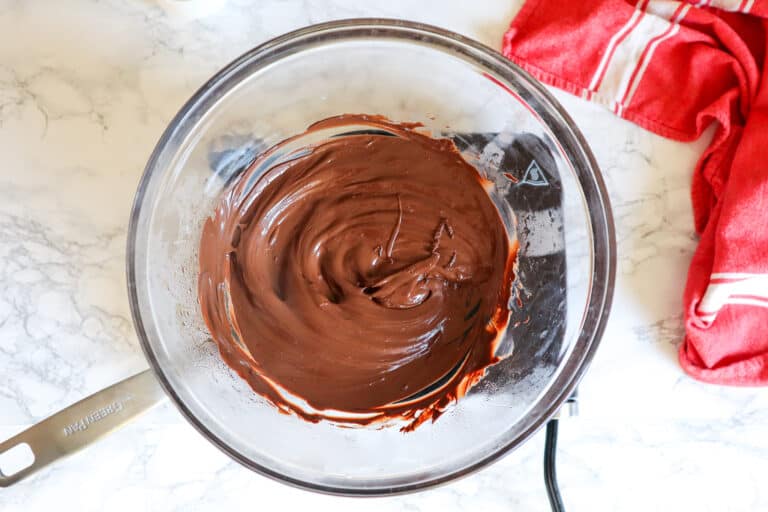
If you are using a chocolate bar, break it into small pieces. You can melt the chocolate using the double boiling method or in the microwave. Using the microwave is the easiest way to melt chocolate. To temper the chocolate in the microwave, first melt the chocolate for 30 seconds in a microwave-safe bowl. Then, melt it in 15-second intervals, stirring in between, until all the chocolate is melting.- After the intial 30 seconds: Remove from the microwave and stir the chocolate with a spatula. (Note: not all the chocolate will be melted, but as you stir it will help melt the chocolate.)
- Continue to melt the chocolate in 15-second intervals, stirring in between each time. The chocolate should be fully melted and smooth once it is done. If you have an instant-read thermometer, the chocolate should read between 88-90°F.
Tempering Test: Place a small amount of the melted chocolate onto a piece of parchment paper and place it in the fridge for 5 minutes. The chocolate should be shiny and snap loudly if you break it in half.
STEP TWO: Clean The Mold
Use a damp paper towel to clean any dust from the silicone mold. You want the mold to be spotless. Any particles left in the mold will show once the chocolate has set.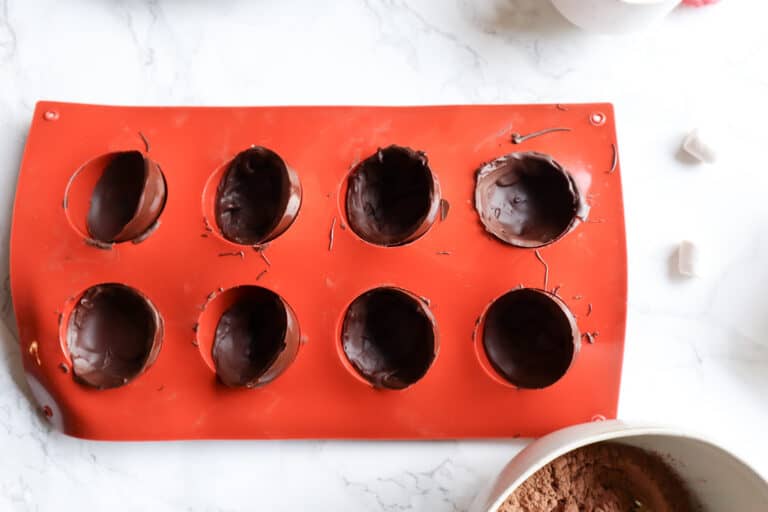
STEP THREE: Transfer The Chocolate Into The Mold
Pour a spoonful of the melted chocolate into the mold and spread the chocolate inside of the mold. Be sure there are no empty spaces and the mold is evenly coated.STEP FOUR: Freeze The Chocolate To Set | 2 Steps
- Once all the mold openings are filled, place the mold carefully into the freezer. Let the chocolate set, about 5 minutes.
- Remove the mold from the freezer. Add a small amount of chocolate along the top perimeter of the chocolate mold. Place the mold back into the freezer for 5-10 minutes.
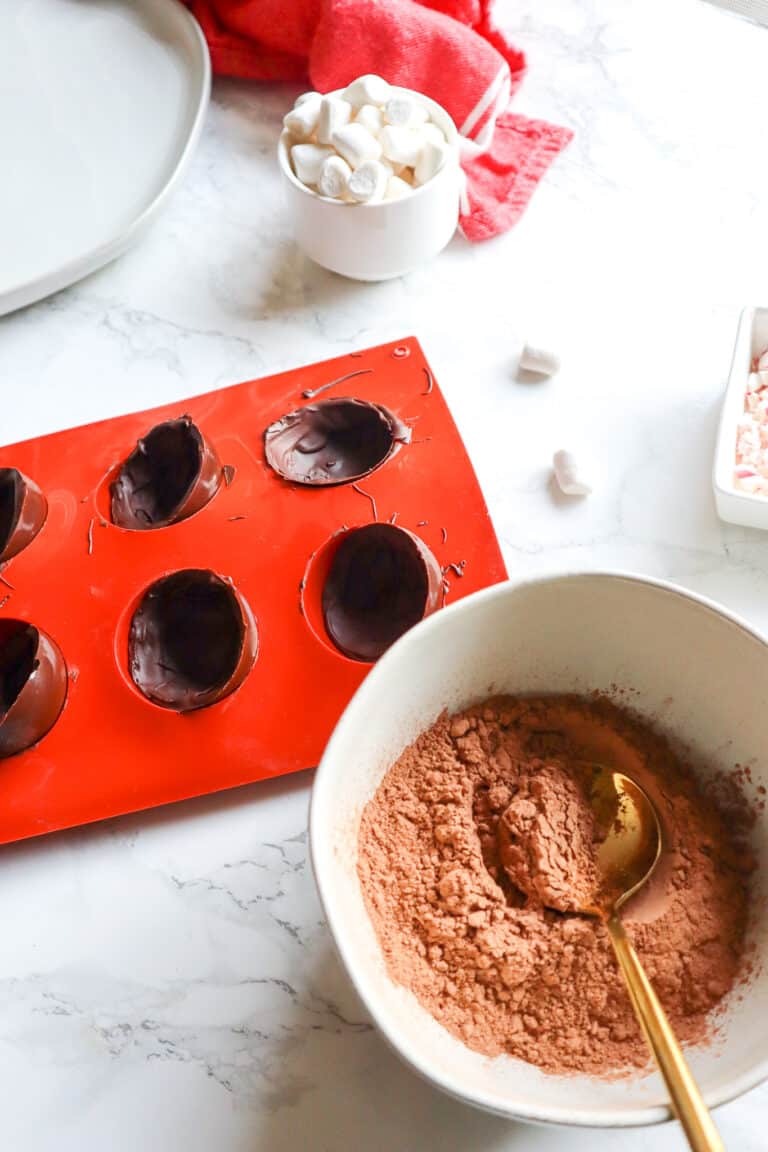
STEP FOUR: Assemble The Hot Chocolate Bombs
Remove the chocolate from the molds carefully and place it on a parchment-lined plate. At this point, you will want to touch the chocolate pieces as minimally as possible so that you do not get fingerprints on the chocolate bombs or cause them to melt. The easiest way to make the bombs is to flip the silicone mat over and use the spaces to hold the mold. Then, fill the mold with hot chocolate and marshmallows.STEP FIVE: Seal The Hot Chocolate Bombs
There are two ways you can seal the chocolate bombs. The first was is to take a microwave-safe plate and heat it in the microwave for 30 seconds. Then take one of the chocolate spheres and gently melt one side and place it onto the filled sphere. Use gloved fingers to gently smooth out any chocolate along the center of the ball. Or you can pour melted chocolate into a piping bag (or Ziploc), then pipe the melted chocolate onto the rim of the chocolate sphere and press the spheres together gently. Use gloved fingers to gently smooth out any chocolate along the center of the ball.
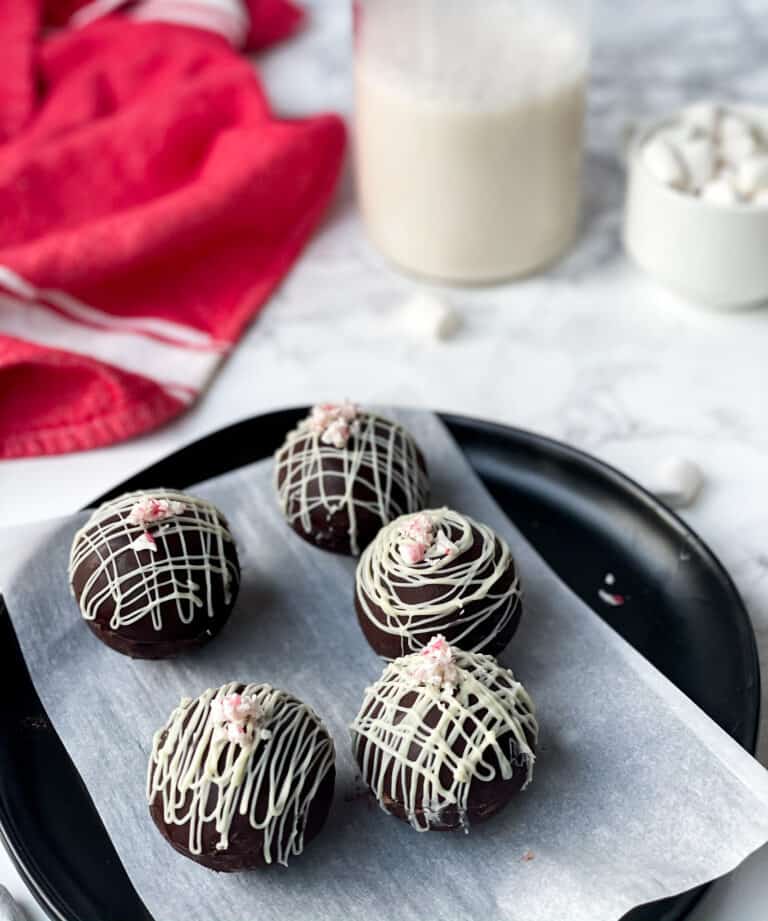
STEP FIVE: Decorate The Hot Chocolate Bombs
I decorated my hot chocolate bombs with white chocolate. Simply melt the chocolate (the same way you melted the chocolate for the bombs) and place it in a piping bag (or small Ziploc bag). You can have fun with it and make swirls, lines, or just wing it; either way, it will look perfect!
How to Use Hot Chocolate Bombs
Start by warming up about 2 cups of milk (non-dairy or regular). I’ve used non-dairy almond milk and coconut milk, both taste great! Once the milk is warm, place the hot chocolate bomb into your favorite mug and pour in hot milk! The hot chocolate bomb will start to melt and the marshmallows will float to the top. Stir the hot chocolate and enjoy!Tips to make your hot chocolate bombs perfectly:
- Make sure to melt the chocolate properly! If you are melting the chocolate in the microwave, be sure to do it in 15-second intervals
- Use food-safe gloves to minimize the fingerprints when assembling the chocolate bombs
- Move quickly when assembling the chocolate bombs. Rinse your hands in cold water to cool down your hands if it helps.
- Once the Hot Chocolate Bombs are assembled, place them in the fridge to completely set.
- Store the Hot Chocolate Bombs in an airtight container and keep them in the fridge until you are ready to enjoy!
I hope you enjoy this Dairy-Free Hot Chocolate Bombs Recipe!
If you make it, don’t forget to rate the recipe and let me know what you think in the comments below! Take pictures, tag #goodfoodbaddie, and share them with me on Instagram! I love hearing from you!More Fun Winter Recipes!
- Dairy-Free Hot Chocolate
- Maca Hot Chocolate
- Dairy-Free Eggnog
- Chocolate Almond Butter Cups with Raspberry
- Vegan Gluten-Free Double Chocolate Chip Cookies
- The Best Rocky Road Brownie Skillet!
- The Best Vegan Gluten-Free Chocolate Chip Cookies
Hot Chocolate Bombs
Equipment
- Semi Sphere Silicone Mold
Ingredients
- 2 cups Chocolate Chips/Chunks
- 4 tbsp Hot Cocoa Mix
- 1/2 cup Mini Marshmallows
Decoration Options
- 1/4 cup White Chocolate
- 1/4 cup Crushed Peppermint
Instructions
- If you are using a chocolate bar, chop the chocolate into small pieces.
- Place the chocolate in a microwave-safe bowl and heat for 30 seconds. Remove the chocolate from the microwave and stir the chocolate.
- Heat the chocolate again in 15-second intervals, making sure to stir the chocolate each time until it is fully melted. Use an instant thermometer to check the temperature, it should read 90°F.
- Use a damp paper towel to make sure the silicone molds are clean.
- Pour a spoonful of the melted chocolate into the mold and spread the chocolate inside of the mold. Be sure there are no empty spaces and the mold is evenly coated.
- Once all the mold openings are filled, place the mold carefully into the freezer. Let the chocolate set for 5 minutes.
- Remove the mold from the freezer. Add a small amount of chocolate along the top perimeter of the chocolate mold to make it thicker. Place the mold back into the freezer for 5-10 minutes.
- Remove the chocolate from the molds carefully and place it on a parchment-lined plate. The easiest way to make the bombs is to flip the silicone mat over and use the spaces to hold the mold. Then, fill the mold with 1 tbsp hot chocolate and marshmallows.
- Seal the spheres together by piping melted chocolate around the edge of one sphere and gently pressing it onto the filled chocolate sphere. Or, you can slightly melt one sphere using a warm plate (warm an empty plate in the microwave for 30 seconds), and gently press the spheres together.
- You can use your gloved fingers to gently smooth out any chocolate along the center of the ball.
- Place the Chocolate Bombs in the fridge for 3-5 minutes to completely set.
- Decorate with melted white chocolate, sprinkles, crushed peppermint, or any of your favorite toppings.
- Enjoy!
Video
Notes
- Use high-quality chocolate that is at least 65% cocoa. Lindt Excellence Bar or Hu Organic Dark Chocolate Bar.
- Here’s is the Silicone Chocolate Bomb Mold I used: Medium Semi Sphere Silicone Mold
- Make sure to melt the chocolate properly! If you are melting the chocolate in the microwave, be sure to do it in 15-second intervals
- Use food-safe gloves to minimize the fingerprints when assembling the chocolate bombs
- Move quickly when assembling the chocolate bombs. Rinse your hands in cold water to cool down your hands if it helps.
- Once the Hot Chocolate Bombs are assembled, place them in the fridge to completely set.
- Store the Hot Chocolate Bombs in an airtight container and keep them in the fridge until you are ready to enjoy!


These are so delish!
I made these for my wifes book club and everyone raved about them!
I am so happy to hear that!! Glad everyone enjoyed the recipe
So fun and festive!