Last updated on August 20th, 2021 at 04:50 pm
Elderberry Ginger Infused Sea Moss Gel is a nutrient-dense, immunity-boosting gel that you can add to your daily wellness routine! Learn how to easily make your own and start to enjoy the health benefits with this easy-to-follow recipe and step-by-step video!
If you’d love to try new, delicious ways to use sea moss, check out my cookbook: Cooking With Sea Moss! The cookbook has over 50 recipes that are plant-based, gluten-free, vegan, and all contain sea moss!!!
Check it out for yourself here: Cooking With Sea Moss by Capri Lilly.

This content contains affiliate links, which help goodfoodbaddie.com to provide free recipes and resources. As an Amazon Associate, I earn from qualifying purchases. Thank you for your support of the blog!
Sea Moss is ever-growing in popularity and for good reason! It is an incredibly nutrient-dense algae that has a wide range of health benefits! I go into great detail about sea moss and its benefits in this post: Sea Moss Benefits + How to Make Sea Moss the Right Way.

What is Sea Moss?
Irish Sea moss, also known as Chondrus Crispus, is a type of red algae native to the Atlantic shorelines of the Caribbean Islands, North America, Europe. Sea moss has become increasingly popular due to Dr. Sebi’s teachings on the healing properties of sea moss.
What Are The Benefits of Sea Moss?
Sea Moss is:
- Rich in amino acids, vitamin c, vitamin A, omega-3 fatty acids, antioxidants, and minerals.
- Contains 92 of the 102 minerals that our bodies need like zinc, iron, calcium, and more!
- Helps your body get rid of any excess mucus, which is particularly helpful if you have a cold or congestion.
- Is a prebiotic and helps to get rid of bad bacteria in the gut, which further increases digestive health.
- It’s great to apply topically due to its high vitamin and mineral content. It helps improve eczema, psoriasis, and acne outbreaks
What is Elderberry Ginger Sea Moss?
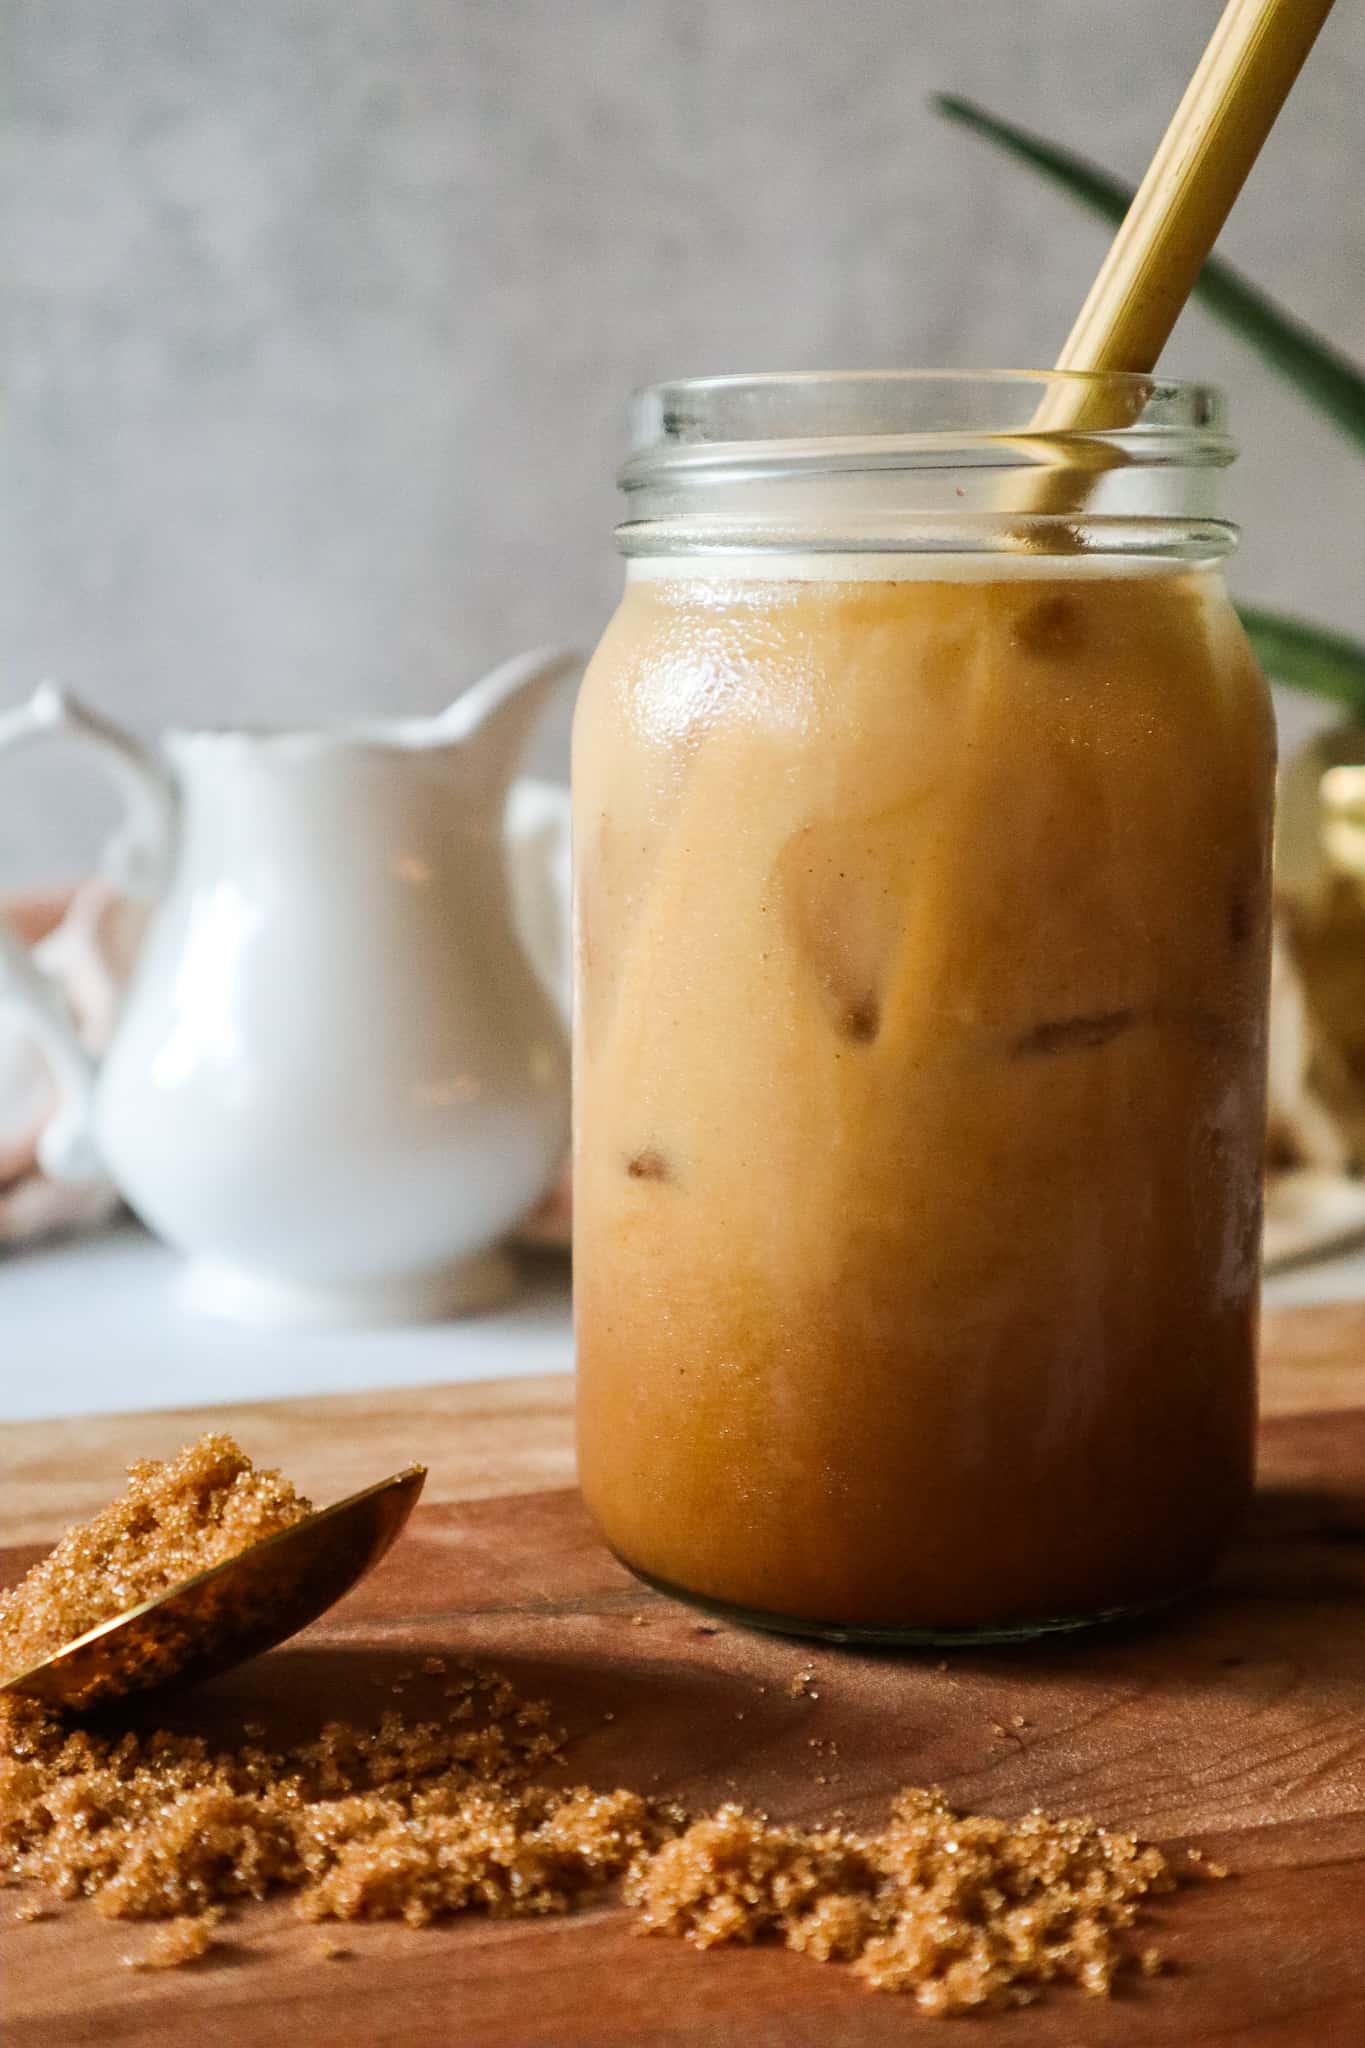
Elderberry Ginger Sea Moss Gel is an infusion of sea moss with an elderberry ginger mixture combined and blended to create a gel that is easy for consumption. It provides your body with extra nutrients from each of the incredibly powerful superfoods: Elderberry, Ginger, and Sea Moss. You can use Elderberry Ginger Infused Sea Moss in your smoothies, drinks, jams, salad, and more!

Elderberry Ginger Infused Sea Moss Gel
This sea moss gel recipe provides all of the incredible benefits from the sea moss and provides an extra nutrient boost from the elderberry and ginger, which are both powerful antioxidant-rich superfoods.

Benefits of Elderberry
- Best known for its ability to fight cold and flu symptoms
- High in antioxidants (particularly anthocyanin), which work to boost the immune system
- It has anti-inflammatory properties, which helps to reduce inflammation, swelling, and stress in the body
- Packed with vitamin C, vitamin A, fiber, folate, and calcium
These are only a few of the amazing benefits elderberries provide! Keep in mind that raw elderberries need to be cooked before using. To make this Elderberry Ginger Infused Sea Moss Gel, I used dried elderberries: Naturtonix Wildcrafted Elderberries.
Benefits of Ginger
- Has remarkable medicinal properties and has been used in traditional and alternative medicine for centuries
- High in Gingerol, a powerful antioxidant, anti-viral, and anti-inflammatory compound that works to reduce inflammation, boost the immune system, and reduce oxidative stress.
- Commonly used to treat nausea, congestion, migraines, and joint pain.
- Helps to improve digestion and reduce constipation
Fresh ginger works best in this sea moss recipe. You can easily find ginger at your local grocery store, typically in the produce section.

How to Prepare Sea Moss
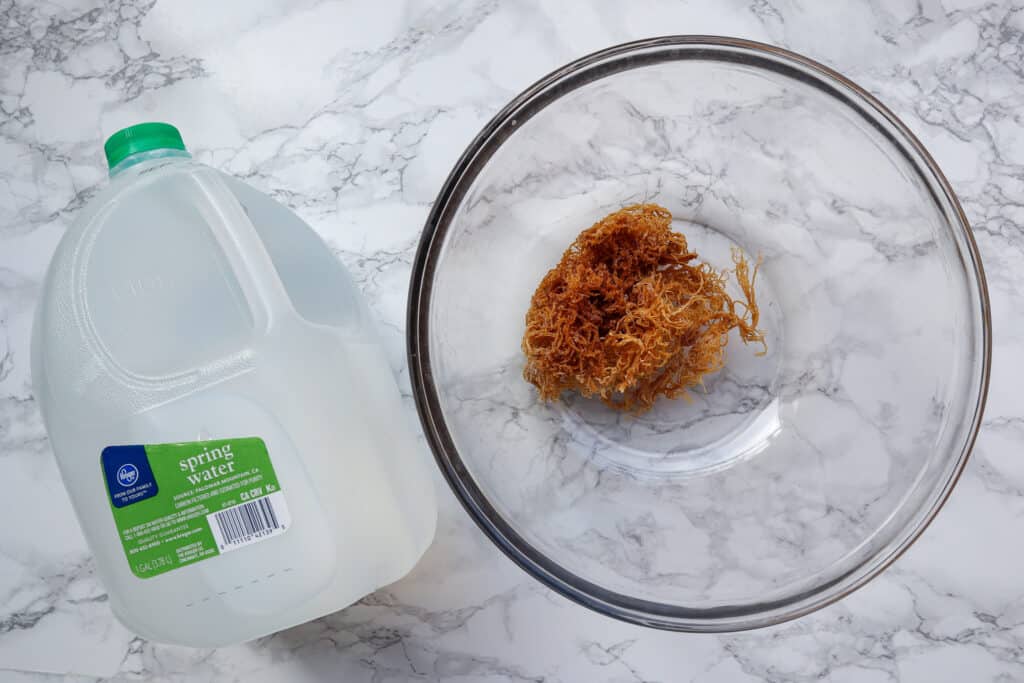
First, you must clean the sea moss and remove any sea debris, dirt, or particles. Use clean hands to massage and remove any visible particles or dirt. When cleaning your sea moss, use spring water, purified water, or alkaline water. Never use tap water to clean your sea moss.

After cleaning your sea moss, place the sea moss in a large bowl and cover it with water (alkaline, purified, or spring). Make sure the sea moss is fully submerged and covered with water. Then, cover the bowl and let the sea moss soak for at least 12-24 hours (the longer the better). You can leave it on the counter covered at room temperature. You do not need to soak the sea moss in the refrigerator.
How To Make Elderberry Ginger Infused Sea Moss Gel?
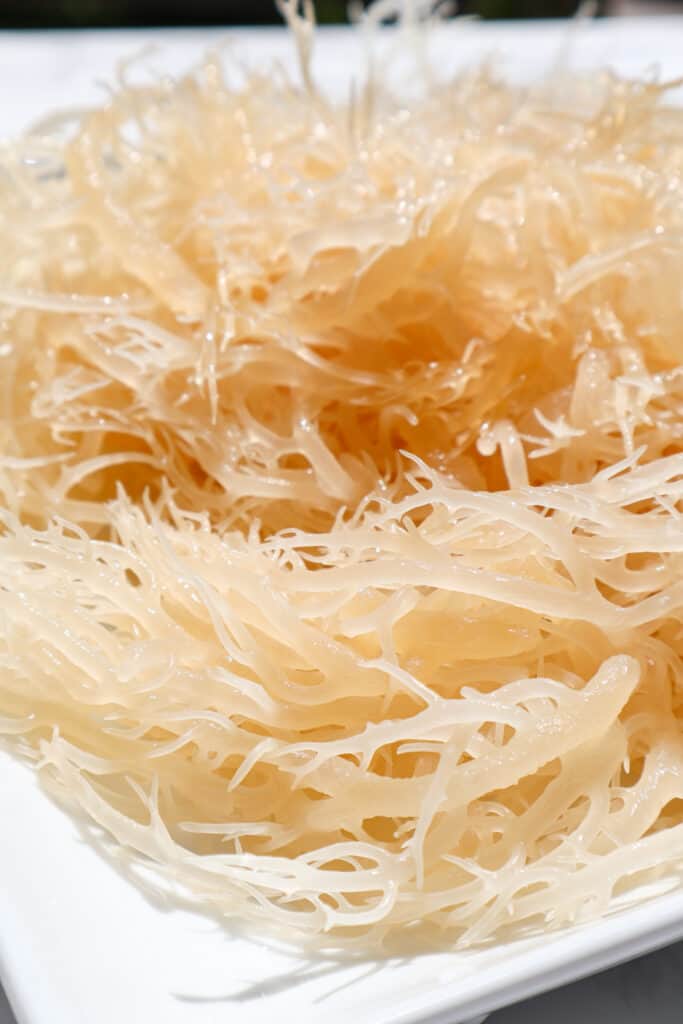
After your sea moss has soaked and expanded, remove the sea moss from the water and transfer it to a clean plate. Discard the water that was used to soak the sea moss.

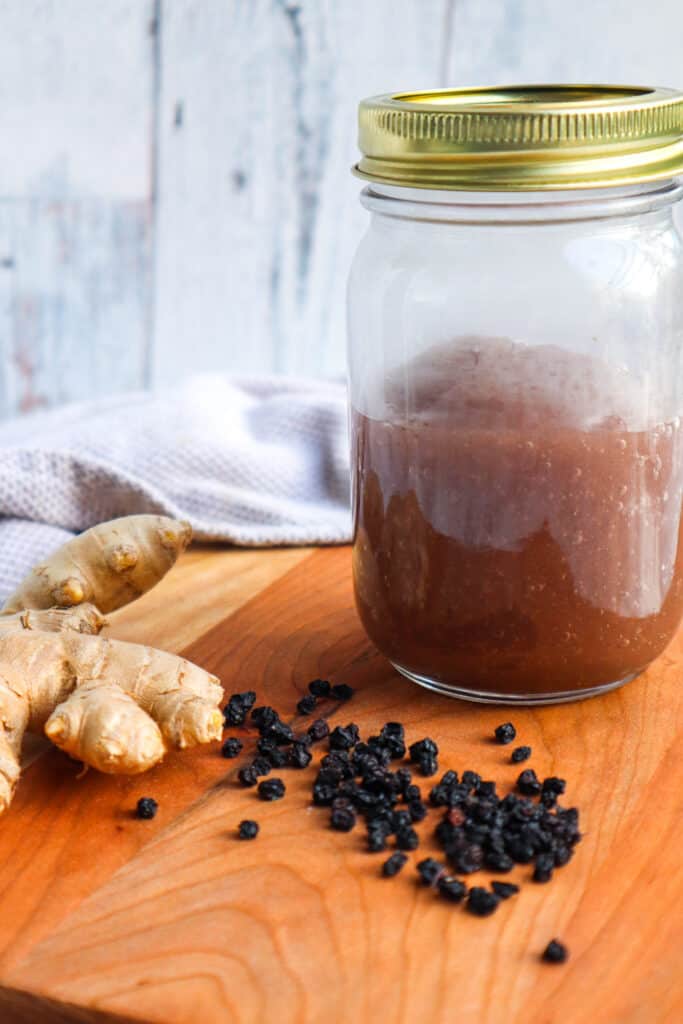
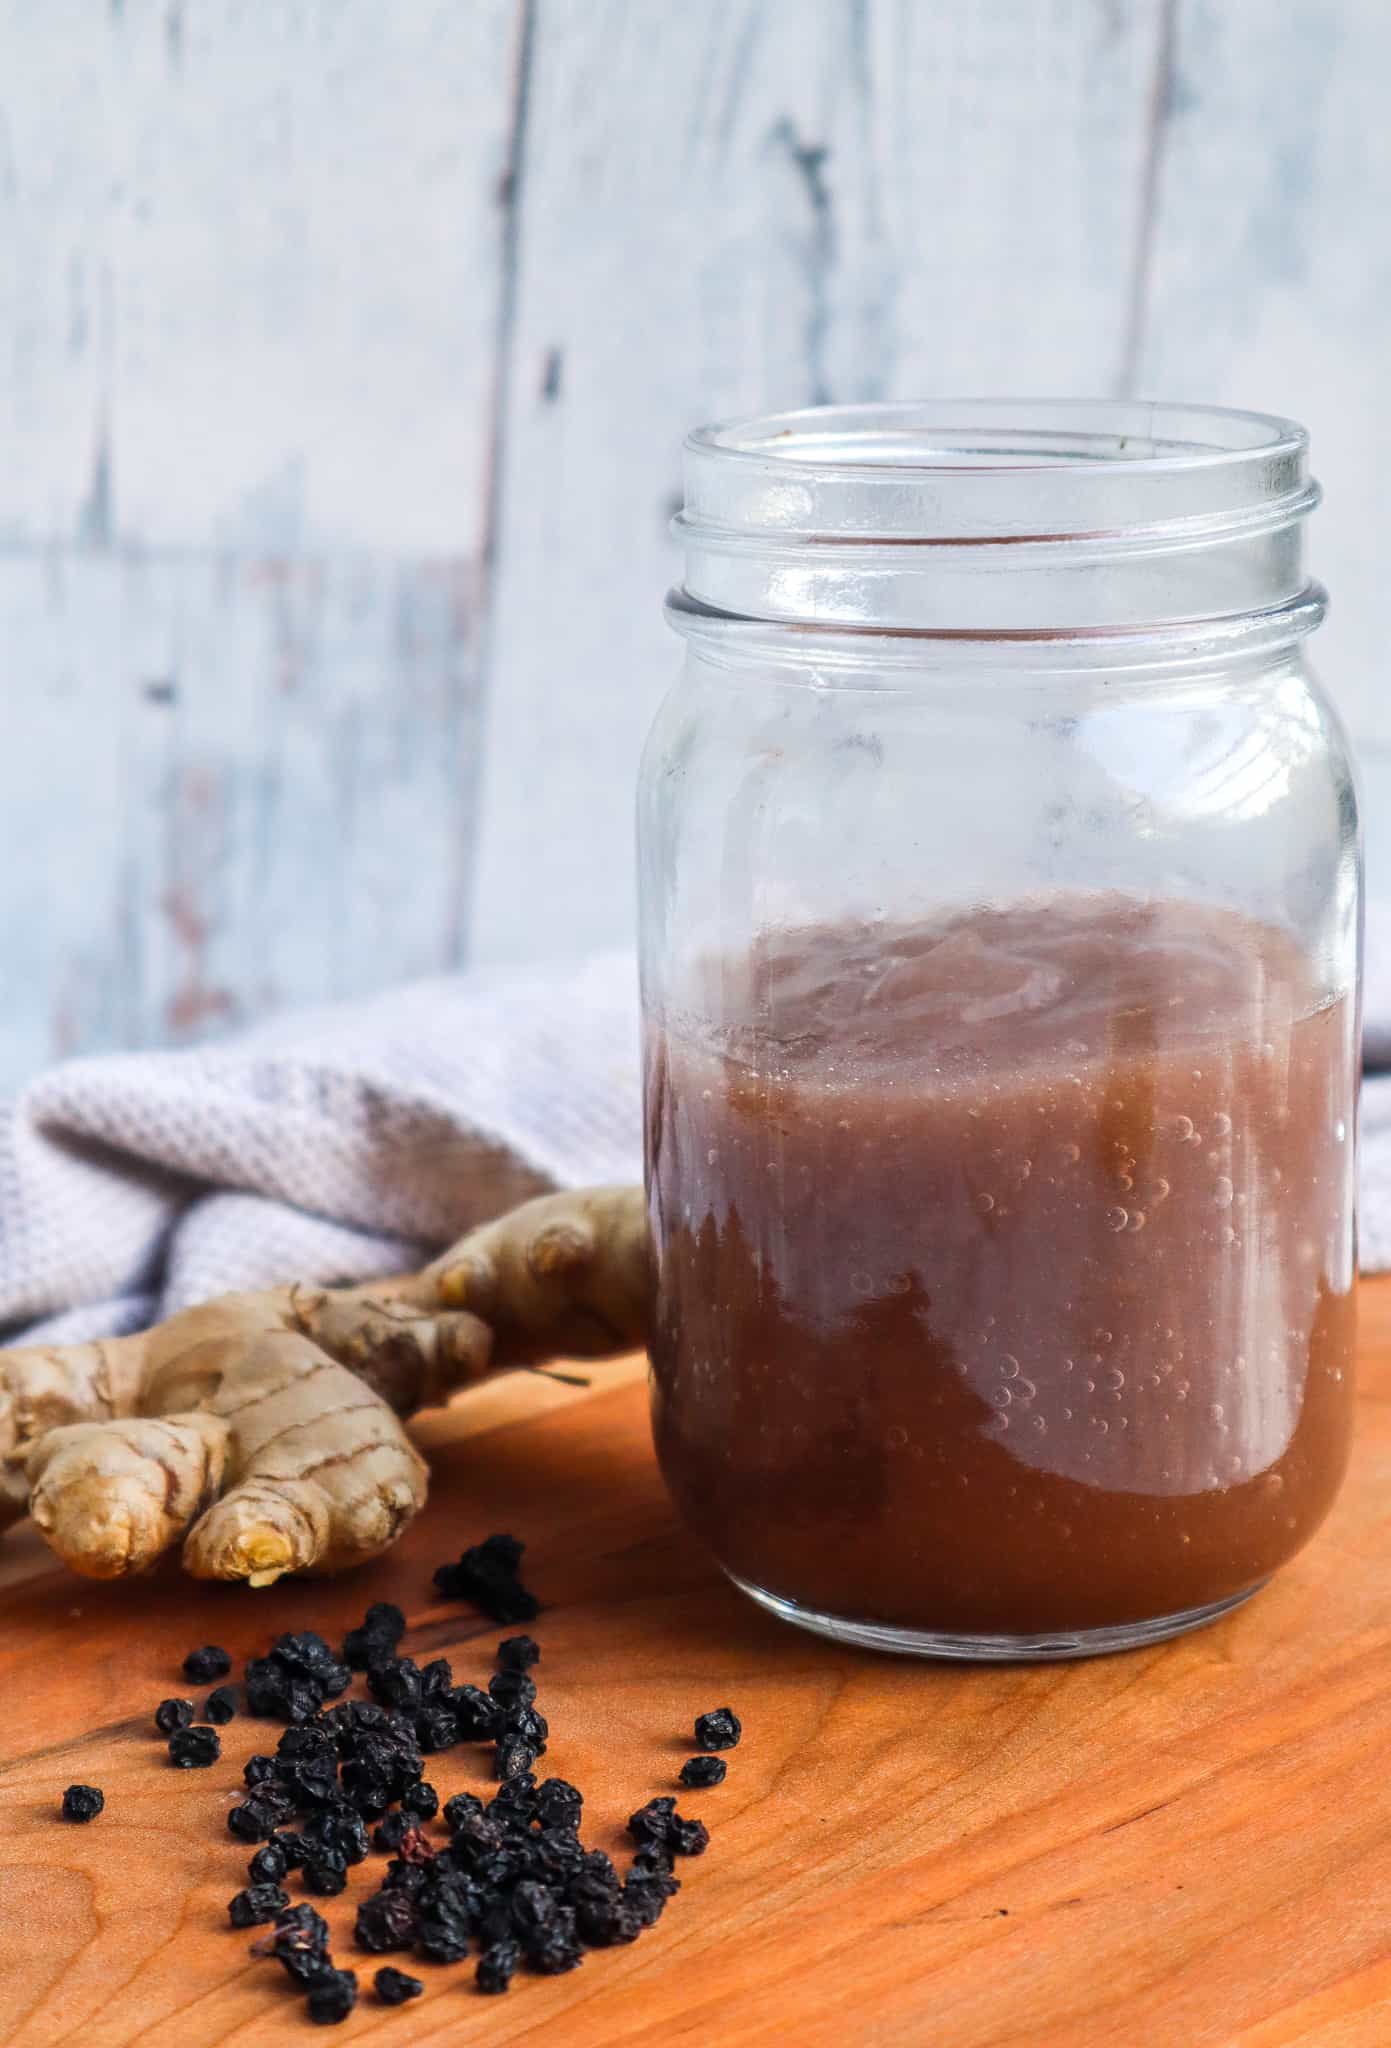
Grab a small saucepan and add 2.5 cups of spring, filtered, or alkaline water. Add 2 -3 tablespoons of dried elderberries to a tea infuser or tea filter bag and add it to the saucepan. Then, slice 2-3 inches of ginger and add it to the saucepan. Allow the ingredients to boil (on low) for 25 minutes. This helps to bring out the beneficial properties of the elderberries and ginger.

Remove the saucepan from the heat and allow the mixture to cool completely, about 10 minutes. You do not want to expose the sea moss to unnecessary heat. Remember, we want the sea moss to retain as many nutrients as possible.

Once the Elderberry Ginger Water has cooled, you can begin to prepare your Elderberry Ginger Infused Sea Moss Gel. Transfer your sea moss into a high-powered blender. Start by adding one cup of the elderberry ginger water to the sea moss and blend until it is smooth, about 1-2 minutes.

You can add more liquid, depending on your desired consistency. I like to use 2 cups of liquid. The sea moss gel will thicken significantly once you transfer it to the fridge.
Transfer your Elderberry Ginger Infused Sea Moss into an airtight container/mason jar, and refrigerate. The sea moss gel will thicken in the fridge after about 2 hours.
Enjoy Your Elderberry Ginger Infused Sea Moss Gel!
Is it okay to boil sea moss?
Do not boil sea moss. Exposing the sea moss to high temperatures reduces its natural potency. To yield to most benefits, soak your sea moss in room temperature alkaline or spring water for 12-24 hours.
What is the best way to consume sea moss?
Some people take sea moss gel on its own. I like to add sea moss gel to my smoothies and find it is the best way to mask the taste of sea moss. (In smoothies, I can hardly taste the sea moss at all!) You can also add sea moss to salads, soups, fruit dips, or jam, like in this Blueberry Chia Sea Moss Jam!
If you would like nutritious smoothie ideas, check out my post: 16 Healthy Superfood Smoothies!
How much sea moss to take daily?
The recommended amount to take daily is 1-2 tablespoons or 4 to 8 grams per day.
Where do you buy Sea Moss?
It is very important to buy sea moss from a trusted and reputable supplier! Beware of fake sea moss, which tends to have a chlorine smell or appear flakey!
I purchase my Sea Moss from Donata Skinfood. Their products are always organic, natural, and vegan. Here is a link to their Organic Wildcrafted Sea Moss.

I hope you enjoy this Elderberry Ginger Infused Sea Moss Gel Recipe. If you try the recipe, don’t forget to rate it and let me know what you think in the comments below! Take pictures, tag #goodfoodbaddie, and share them with me on Instagram! I love hearing from you!
More Sea Moss Related Post:
Sea Moss Benefits + How to Prepare Sea Moss Gel (the right way!)
5 Different Ways to Use Sea Moss Gel
Chocolate Raspberry Sea Moss Smoothie
16 Healthy Superfood Smoothies to Jumpstart Your Day
Elderberry Ginger Infused Sea Moss Gel Recipe
Equipment
- Blender
Ingredients
- 1 oz Dried Raw Irish Sea Moss (about 29 grams when weighed)
- Spring or Alkaline water for cleaning and soaking
Elderberry Ginger Liquid
- 1/4 cup Dried Elderberries
- 2-3" Fresh Ginger
- 4 cups Spring or Alkaline Water
Instructions
To Prepare Sea Moss
- Place the dried sea moss in a large bowl, cover it with water, and massage the sea moss. Be sure to remove any visible dirt and debris. Drain and repeat this step once more.
- Place the sea moss in a large bowl and cover it with filtered, spring water, or alkaline. (do not use tap water) Make sure all the parts of the sea moss are covered. Allow the sea moss to soak for 12-24 hours. (at room temperature)
- After your sea moss has soaked and expanded, remove the sea moss from the water and transfer it to a clean plate. Discard the water that was used to soak the sea moss.
How to Make Elderberry Ginger Infused Sea Moss Gel
- Grab a small saucepan and add 4 cups of spring, filtered, or alkaline water. Add 1/4 cup of dried elderberries to a tea infuser or tea filter bag and add it to the saucepan. Then, slice 2-3 inches of ginger and add it to the saucepan. Allow the ingredients to boil (on low) for 30 minutes, or until the liquid is reduced by half.
- Remove the saucepan from the heat and allow the mixture to cool completely, about 10 minutes. (Be sure to strain the mixture before using. Do not consume raw elderberries.)
- Once the Elderberry Ginger Water has cooled, transfer the sea moss into a high-powered blender. Start by adding one cup of the elderberry ginger liquid to the sea moss and blend until it is smooth, about 1-2 minutes.
- You can add more liquid, depending on your desired consistency. I like to use 2 cups of liquid. The sea moss gel will thicken significantly once you transfer it to the fridge.
- Transfer your Elderberry Ginger Infused Sea Moss into an airtight container/mason jar, and refrigerate. The sea moss gel will thicken in the fridge after about 2 hours.
- Enjoy 1-2 tbsp daily on its own, or in your favorite smoothie, drink, or tea.
- Store the sea moss gel in an airtight container in the fridge for up to 1 month or in the freezer for up to 3 months.
Video
Notes
- Dried Elderberries I use Naturtonix Wildcrafted Elderberries.
- Tea Infuser I use: 2 PC Stainless Steel Mesh Tea Ball Infuser
- Sea Moss I Use: Organic Wildcrafted Sea Moss. from Donata Skinfood
Nutrition
Please refer to my Nutrition Disclaimer Here.
Want to take your Elderberry Ginger Infused Sea Moss to the next level? Use it to make these Elderberry Ginger Infused Sea Moss Gummies with Bladderwrack!


Your recipe says use 1 oz. of seamoss and the video says 3 oz. which one should I use. 1 or 3 ounces?
1 oz
Hi there. So, I made this for my mom and sister and shipped it to them in New York. I shipped it on a Monday and they received it on Wednesday, but it leaked and exploded when they opened it. All I could think of maybe the elderberries are acidic. It’s the only thing I can think of. Can you suggest a preservative that will prevent this from happening. Thank you so much.
Hi Eboni! If you want to ship the sea moss gel, you should ship it in a cooler or on ice.
This looks Incredible. I have to make this soon for my family!
Absolute keeper! This is delicious.
Can’t wait to try this gel during cold and flu season!
It is a game changer! I hope you enjoy!