Last updated on April 1st, 2025 at 06:29 am
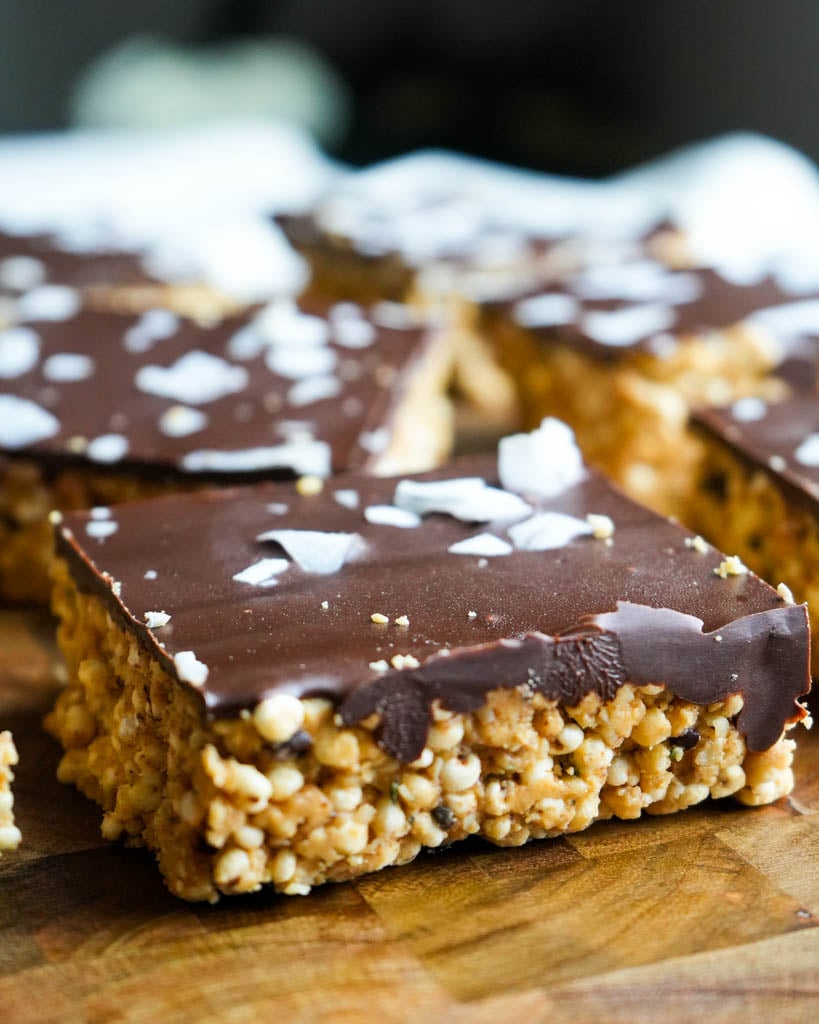
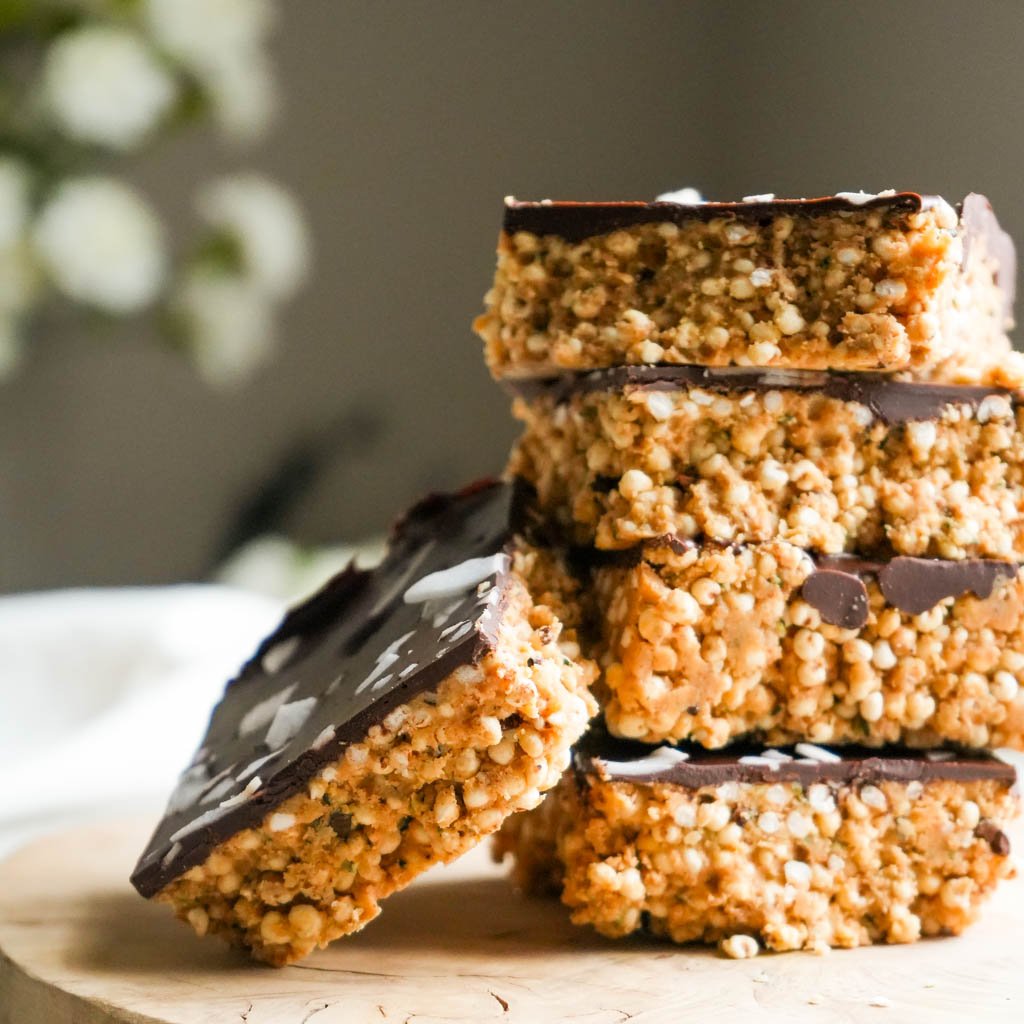
These Puffed Quinoa Protein Bars are the perfect post-workout snack. They’re made with seven simple ingredients and provide 22 grams of protein.

After my workout, I like to eat something clean that will replenish my body. I like to have a post-workout smoothie or if its easy morning I will have my high protein chia pudding, but sometimes I am on the go and don’t have time to make a smoothie or prepare breakfast. That’s where these puffed quinoa bars come in handy.

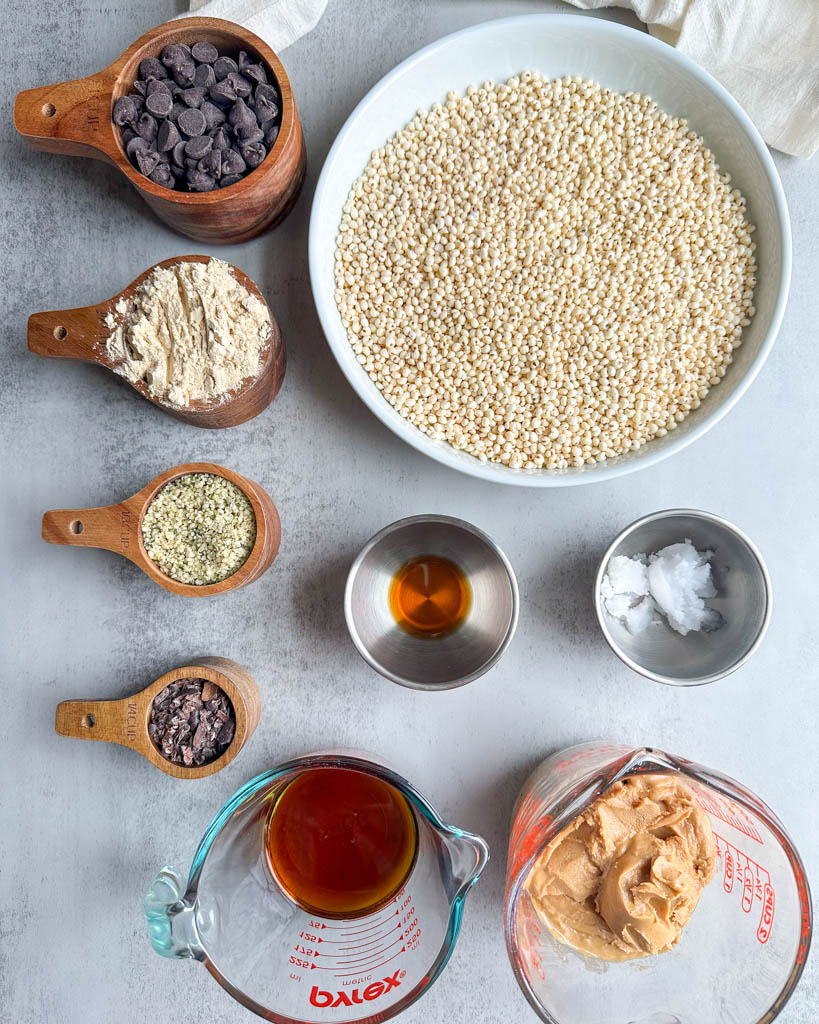
Ingredients You’ll Need
- Puffed Quinoa: You can usually find puffed quinoa in the cereal section at the grocery store. (I found it at my local Sprouts and Whole Foods.)
- Creamy Nut Butter: I like to use peanut butter. Make sure your nut butter is creamy. To keep these protein bars nut-free, you can use sunflower butter.
- Hemp Seeds: Adding more seeds provides even more protein and antioxidants to the protein bars.
- Cacao Nibs: I love cacao nibs because they add a nice crunch and they’re also full of magnesium and protein.
- Pure Maple Syrup + Vanilla Extract: This gives the bars the perfect level of sweetness without being too overpowering.
- Protein Powder: Use a grain-free plant-based protein, like pea or hemp protein, to keep these puffed quinoa bars grain-free.
- Chocolate Chips + Coconut Oil: Adding the chocolate on top is optional, but highly recommended. Use vegan chocolate to keep the bars vegan.
How To Make Puffed Quinoa Bars
Making these bars is super easy!

STEP 1: Combine all the ingredients in a bowl (except the chocolate) and stir until it’s sticky. If needed, add more creamy peanut butter so that everything sticks together.
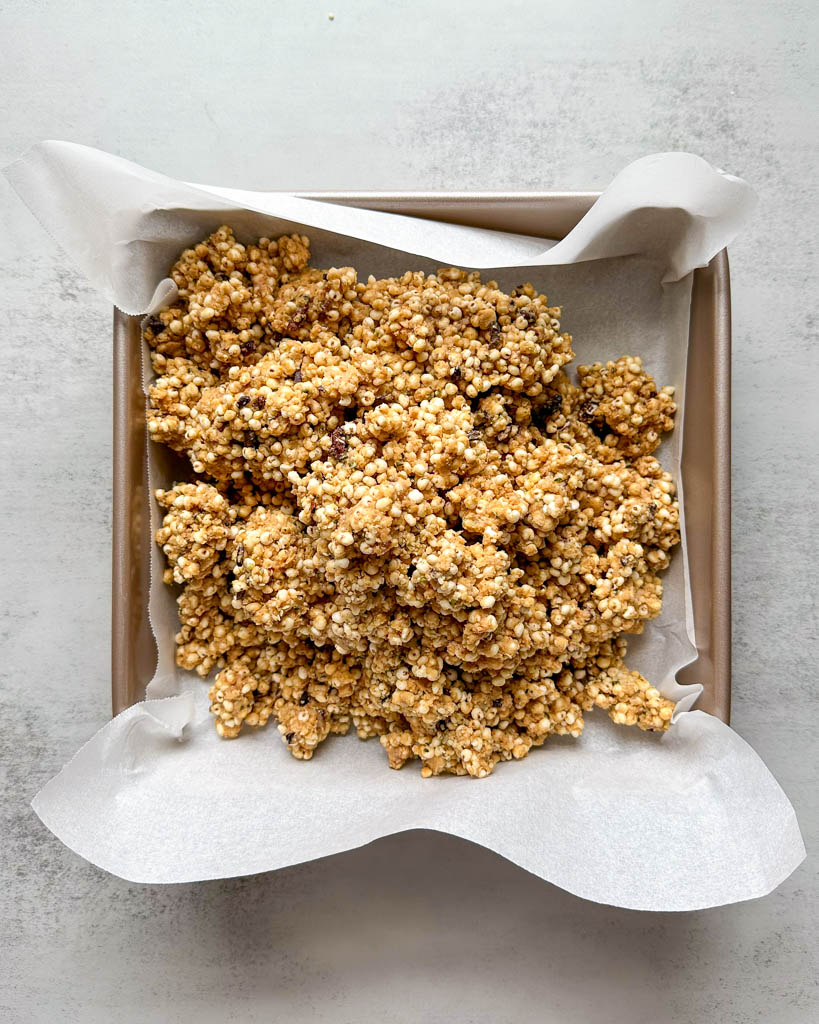
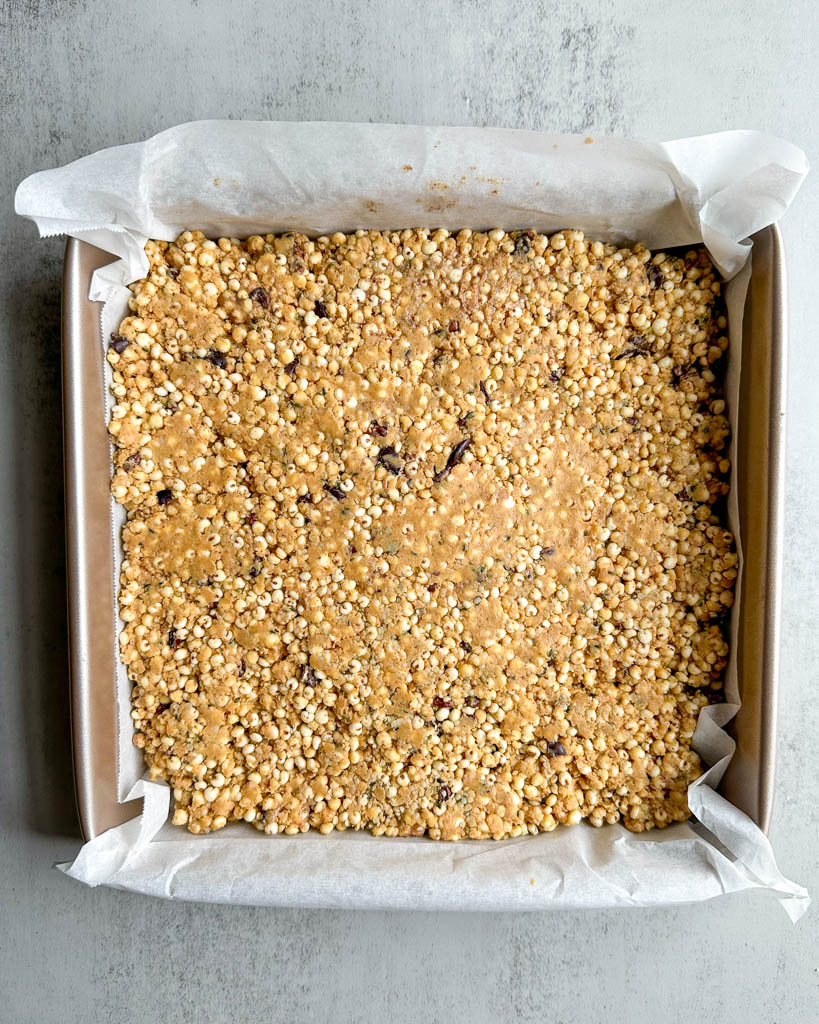
STEP 2: Add the mixture to a parchment-lined 8×8 baking dish. Flatten it with a spatula. Be sure to press firmly and make sure it is in an even layer.
STEP 3: Add the chocolate chip and coconut oil to a bowl. Melt in 30-second increments, stirring in between, until it is fully melted. Pour the chocolate on top of the quinoa mixture. Spread in an even layer
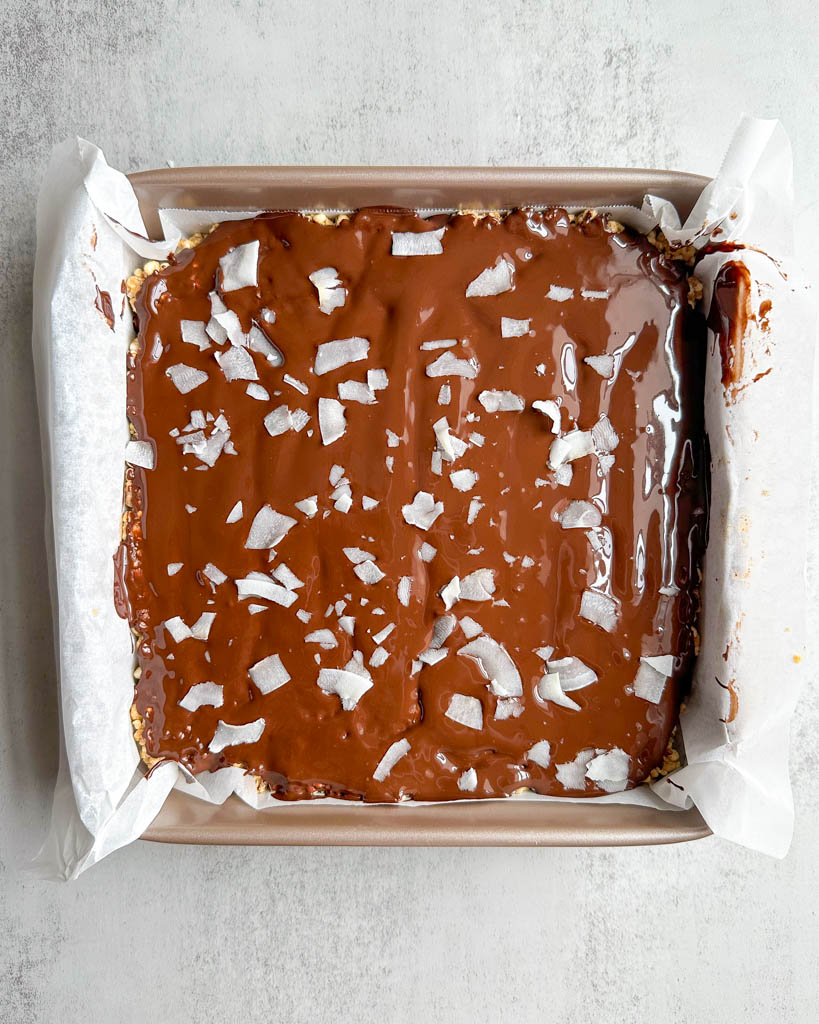
STEP 4: Sprinkle with coconut flakes or flakey sea salt on top. Place in the freezer for an hour, or in the fridge for 3-4 hours. Once set, remove from the fridge and slice into 9 even slices.

Common Questions
Quinoa is a whole grain seed that is cooked, while puffed quinoa is quinoa that has been heated rapidly, causing it to expand and puff up, resulting in a light and crunchy texture.
Yes, puffed quinoa is relatively high in protein compared to other grains, providing about 6-9 grams of protein per 1-cup serving.
You can usually find puffed quinoa in the cereal aisle or grain aisle at specialty grocery stores like Whole Foods or Sprouts. You can also order it online at Amazon. Keep in mind that it may be called puffed millet.
Storing Your Puffed Quinoa Bars
Store these quinoa bars in an airtight container in the fridge for up to 2 weeks. You can also place them in a ziploc bag and freeze them for up to 2 months.
Puffed Quinoa Protein Bars (Grain-Free!)
Ingredients
- 3 cups Puffed Quinoa
- 1 2/3 cup Creamy Peanut Butter, plus more as needed
- 1/3 cup Hemp Seeds
- 1/4 cup Cacao Nibs
- 1/2 cup Protein Powder
- 2 tsp Vanilla Extract
- 1/3 cup Maple Syrup, plus more as desired
Chocolate Topping
- 1 cup Dark Chocolate Chips (vegan)
- 1 tablespoon Coconut Oil
- Coconut Flakes or Flakey Sea Salt, for topping optional
Instructions
- COMBINE: Add all the ingredients to a large bowl and mix well until sticky.
- PRESS: Transfer the mixture into an 8×8 parchment-lined baking dish. Press firmly into a single layer.
- MELT CHOCOLATE: Add the chocolate chip and coconut oil to a bowl. Melt in 30-second increments, stirring in between, until it is fully melted. Pour the chocolate on top of the quinoa mixture. Spread in an even layer
- CHILL: Sprinkle with coconut flakes or flakey sea salt on top. Place in the freezer for an hour, or in the fridge for 3-4 hours. Once set, let the quinoa bars sit at room temp for 10 minutes. Then, slice into 9 even slices.
Notes
- Use any nut or seed butter you like!
- These are the perfect on-the-go snack
- The amount of protein will vary depending on the ingredients you use
Nutrition
If you try the recipe, don’t forget to rate the recipe and let me know what you think in the comments. Leave a quick review & star rating ★ below! Take pictures, tag #goodfoodbaddie, and share them with me on Instagram, Facebook, and Pinterest! I love seeing my recipes come to life in your kitchen.
I made this yesterday so I could have a good snack after my workout routine. They are soooooo good!! And I love that they have feel good ingredients in them
I love these after a workout too! I am glad you like 🙂
I took a road trip this weekend and brought these for a snack. I loved it. It felt better than grabbing the processed stuff at the rest stops. Thanks for the recipe!